How to Tie a Loop Knot for Friendship Bracelets
How to tie a single sliding knot for bracelets and necklaces
HOW TO MAKE A SINGLE SLIDING KNOT FOR BRACELETS, ANKLETS, AND NECKLACES. CREATE AN ADJUSTABLE LENGTH NECKLACE USING FABRIC OR LEATHER CORD.
An alternative to a necklace chain or a chain bracelet is a simple tied cord. It is ideal for beach jewellery, friendship bracelets, anklets, and more laid-back relaxed designs.
Using sliding knots will allow you to easily slip the necklace/bracelet on and off, and you can also adjust the length - important if you are making it for someone else, or making jewellery to sell.
Here are instructions from Petra Cameron, Metal Clay UK, on how to create a single sliding knot, which gives a slightly tidier look than two sliding knots. With two knots, the knots will be visible as you're wearing the jewellery, whilst with one the knot will be hidden at the back of the neck on a necklace, or underside of a bracelet.
This technique works well with kumihimo and macrame cords, leather and sueded thong, waxed cotton, embroidery floss, and many other materials as long as they're soft enough to wrap and knot.
In the instructions I will refer to the piece as a bracelet, but this technique is equally suitable for necklaces and anklets. In the pictures the knot cord is in a contrasting colour so you can easier see what I am doing - you can use a contrasting colour as a design effect, or, to make the knot less visible, just use the same cord you used for the bracelet.
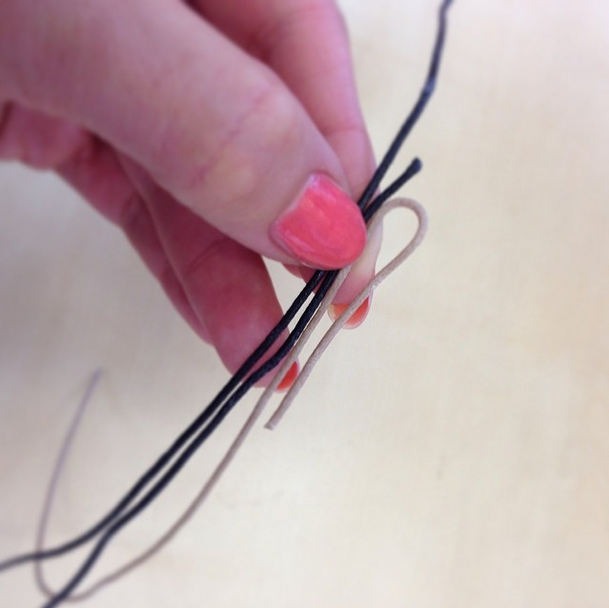
Step 1
Cut a short length of cord to make your sliding knot from. You'll need about 10-15cmto work with it, if it is too short it will be hard to hold on to it and wrap it.
Lay the two bracelet cord ends along each other with the ends pointing away from each other. Make a loop at one end of the knot cord, leaving one leg shorter, about 3cm - it needs to be a little longer than your finished sliding knot will be. Lay the knot cord alongside the bracelet cords, keeping them all straight and not crossing over each other.
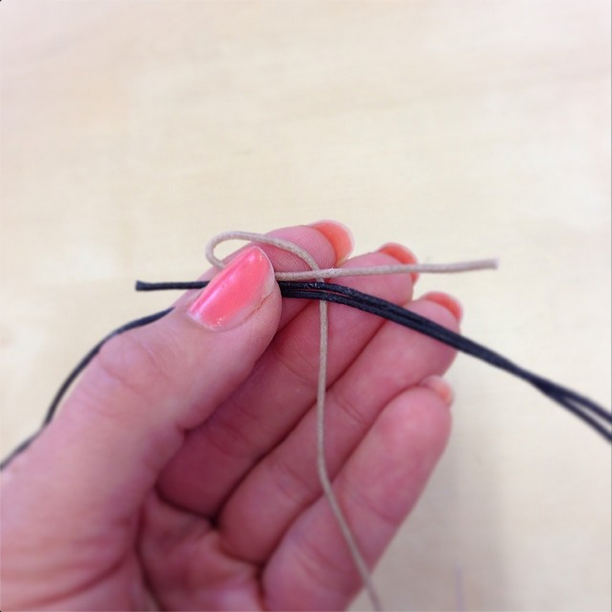
Step 2
Start wrapping the long end of the knot cord around the three other cords (the short end, and the two bracelet cords). Make the wraps loose, as you'll need to thread the cord back through all the loops later.
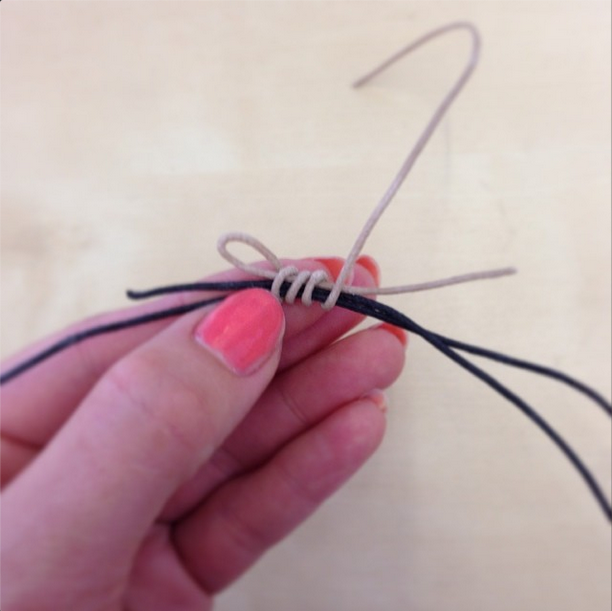
Step 3
Keep wrapping until you have at least five wraps - the amount of wraps will determine the size/length of your knot. Don't forget to keep the looped wraps loose.
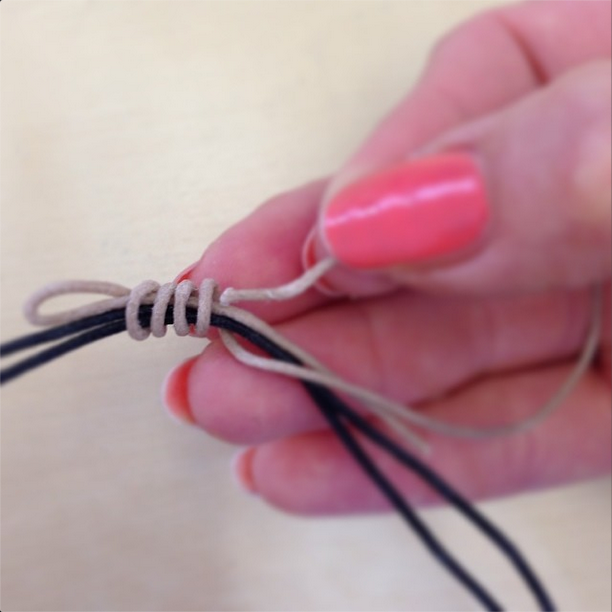
Step 4
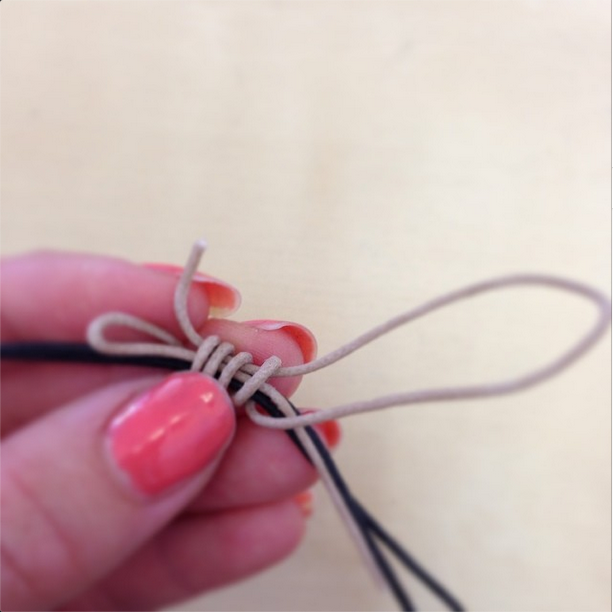
Now you want to thread the cord back through the loops you've just done. Keep all the cords straight and alongside each other.
Step 5
Pull the cord through until you see something looking like this: the knot cord will now have to ends, and two loops.
Step 6
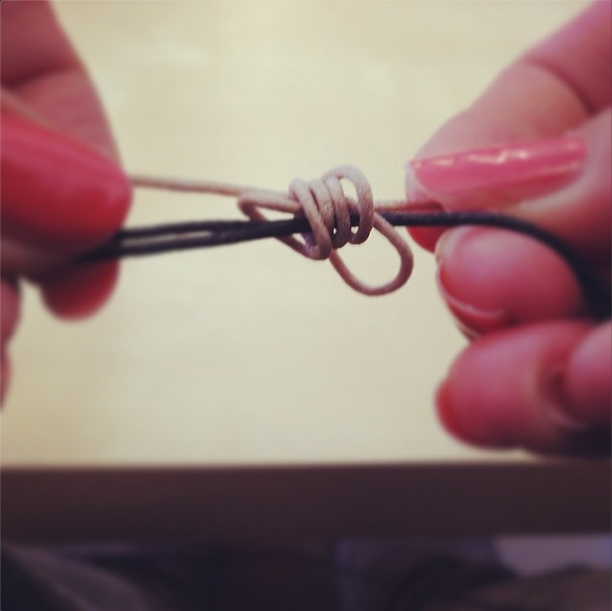
Now slowly start pulling on the two ends to tighten up your knot. Whilst pulling, make sure the loops stay in their place, and don't start slipping over each other. Gently coax them into place, whilst tightening up the knot. It will look a little messy, but don't worry, it'll soon come together and will look ok in the end!
Step 7
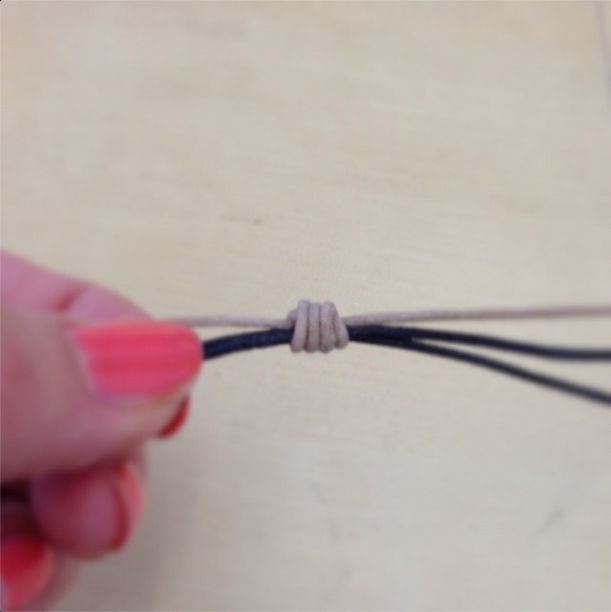
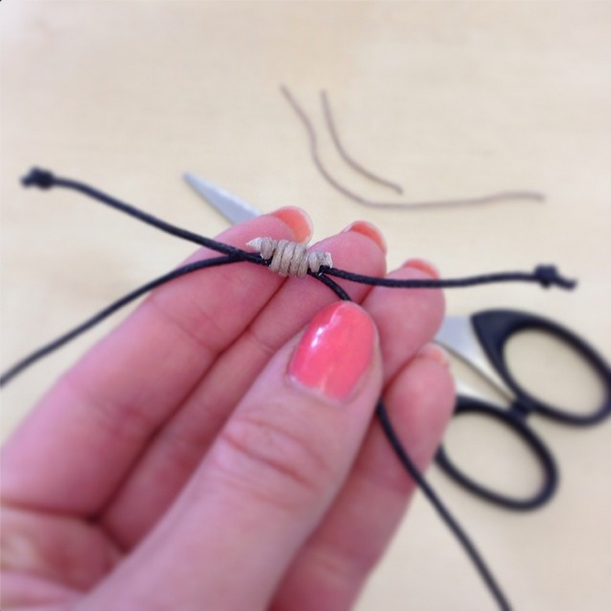
Your knot should now look like this, with tight loops. Don't pull too hard, or it will be difficult for your bracelet ends to slide through the knot.
Step 8
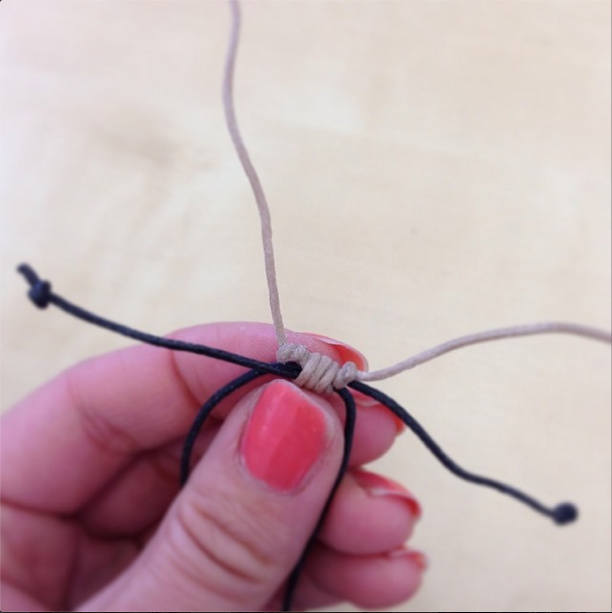
Now make a knot on each end of the knot cord (lots of knots in this sentence!) and slide them up towards the main knot itself as you are pulling them close. Also make a knot at each end of the bracelet cords so they can't slip through the knot. You can decorate the knots with little beads or leave them plain.
Step 9
Cut off the ends close to the knots. You can secure the knots with a little superglue - apply with a toothpick and make sure it doesn't spill on to the sliding cords or it won't be a sliding knot anymore! Aaaaaand, you're done!
How to Tie a Loop Knot for Friendship Bracelets
Source: https://www.metalclay.co.uk/how-to-tie-a-single-sliding-knot-for-bracelets-and-necklaces/